Image Credit: Samuel Dejours/Engadget
The larger sensor also delivers better low light performance, more detail, improved dynamic range and a more cinematic look in general. At the same time, the variable f/2.8 to f/11 aperture makes the camera more flexible in different lighting conditions. If you shoot in really bright sunlight a lot, however, I’d recommend getting the neutral density filter kit.
Shooting at ISO 1600 and 3200, we got clean footage with some noise in shadows and dark areas. However, the noise is well controlled and organic, so it’s not bothersome and can be tamped down with some mild noise reduction. Noise levels start to get excessive at ISO 6400, but that setting is still usable for night scenes if you don’t need a lot of shadow detail.
DJI boosted the H.264 data rate significantly from 100 Mbps to 200 Mbps, and introduced H.265 capture at up to 140 Mbps. That’s an important update, as aerial footage captured by drones can have detail that confounds long-GOP (MP4) compression. As a result, quality is improved under most circumstances, and noticeably so for detailed shots.
That begs the question of whether you even need the ProRes option and 1TB SSD, considering the high price difference. I’d say that it’s a valuable feature for broadcast shooters, as it pushes the drone into professional territory. For others like YouTubers or industrial users, the H.264 quality is easily good enough.
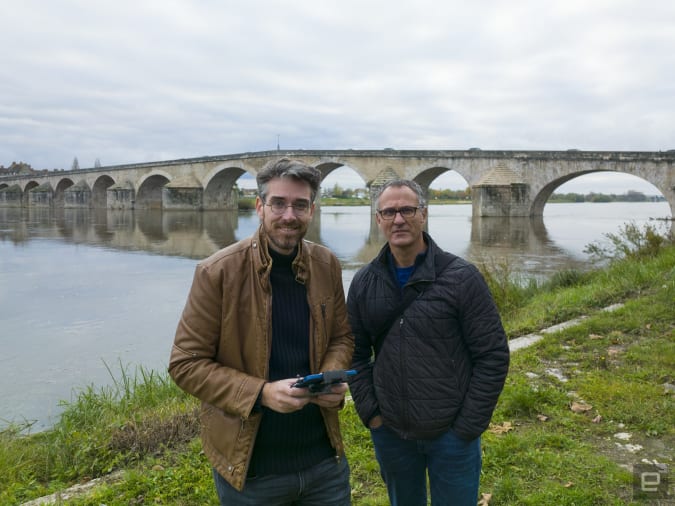
Samuel Dejours/Engadget
The Mavic 3 uses Hasselblad’s color profile that’s supposed to deliver accurate hues. In general, it performed well across the color spectrum, whether we were shooting in cities, coastlines or countryside. Skin tones are warm, and while you might not think that’s terribly important for a drone, the Mavic 3 could see a lot of use in weddings, documentaries and even movies. It’s so smooth that it can replace a crane or dolly for certain shots.
To max out dynamic range and editing flexibility, you can shoot 10-bit D-Log footage. Shooting directly into the sun and other tricky situations, I found that it allowed me to retain dynamic range and bring out extra detail in highlights and shadows.
One of the key new features of the Mavic 3 is the 162mm equivalent telephoto camera with a half-inch sensor. I’ve seen some confusion about zooming on the Mavic 3, so here’s how it works.
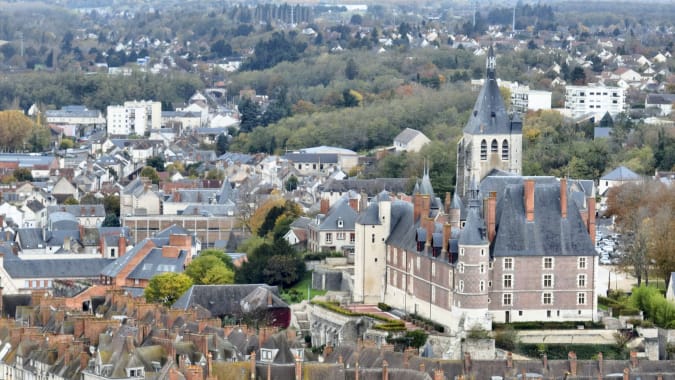
Samuel Dejours/Engadget
The main camera with no digital zoom is equivalent to a 24mm full-frame lens, or what DJI calls a 1X zoom. To zoom in further, you flip the drone into explorer mode on the Fly app. From there, you can either select discreet zoom settings (1X, 2X, 4X, 7X, 14X and 28X) or use a slider for in-between settings. Zooming up to four times is done digitally with the main camera, but the 4X zoom is very pixelated and not usable for any production work.
The 161mm, 12-megapixel f/4.4 telephoto camera kicks in at a 7X zoom, offering 4K video at up to 30 fps. It can digitally zoom up to 28X, but again, quality suffers. For the best-looking footage, you’ll need to stay between a 1X and 2X zoom, or go up to 7X exactly.
The Mavic 2 (not pro), by contrast, has a 28mm lens with a 2X zoom. The Mavic 3’s 7X zoom is more extreme, but does open up some interesting creative possibilities. However, the optical quality on that camera isn’t amazing given the smallish sensor size. In terms of professional use, then, it has limited value.
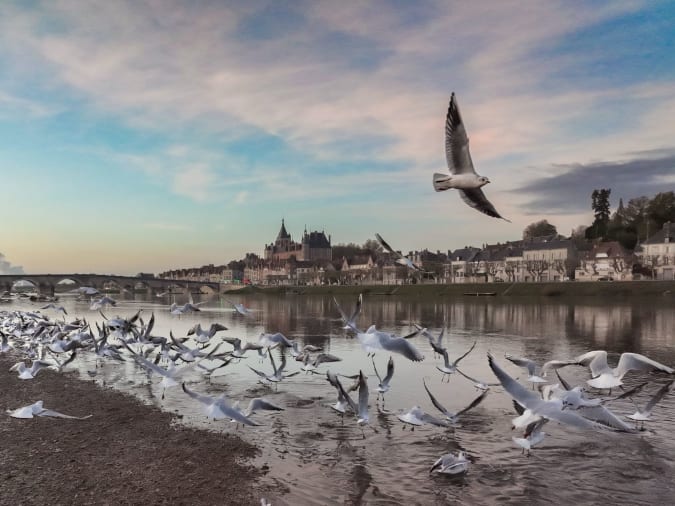
Samuel Dejours/Engadget
On the subject of JPEGs, it’s also a solid photo drone. I was a bit disappointed when I heard that the Mavic 3 had the same 20-megapixel sensor and less dynamic range than the Mavic 2 Pro (12.8 stops compared to 14 stops claimed). However, the larger pixels more than make up for that with improved light sensitivity and lower noise levels.
That said, you’ll want to make sure your footage is properly exposed. The Mavic 3 generally nails the exposure in automatic shooting modes, but it can get tripped up if you’re shooting into the sun. It helps to shoot using RAW DNG files, which give you much more latitude to adjust images in Lightroom.
Photo quality using the telephoto lens was better than the video quality, delivering crisp photos with good color accuracy, but with one key caveat. You can only shoot JPEGs and not RAW files, which limits your ability to adjust shots in post. Again, that makes the telephoto lens less useful for professionals. On the other hand, it could be extremely handy for other types of work, like inspections, search and rescue, bird spotting and so on.
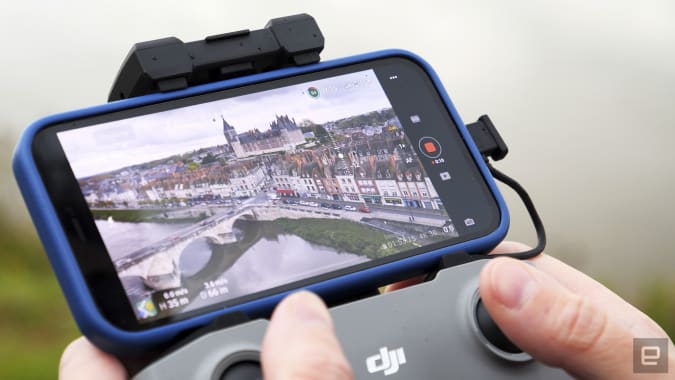
Steve Dent/Engadget
The Mavic 3 is DJI’s easiest drone to fly, thanks to improved obstacle avoidance, and other features. It offers three flying modes: Cine, a slow flight mode for capturing smooth footage, Normal and Sport, the fastest setting.
The Mavic 3 works with DJI’s simplified Fly app, rather than the Go 4 app used with the Mavic 2 Pro. Camera settings like shutter, ISO, video resolution and so on are adjusted on the main flying screen at the bottom right. The record button and various video/photo settings (QuickShot, Hyperlapse, etc.) are found on the right side. For more advanced settings like Safety, Control, Cameras and Transmission, you have to dive into the three dot menu.
Once you fire up the app and connect your smartphone to the RC-N1 controller, you’re ready to turn on the drone. It plays a jaunty three-note tune on startup and is ready to go in less time than the Mavic Air 2S or 2 Pro.
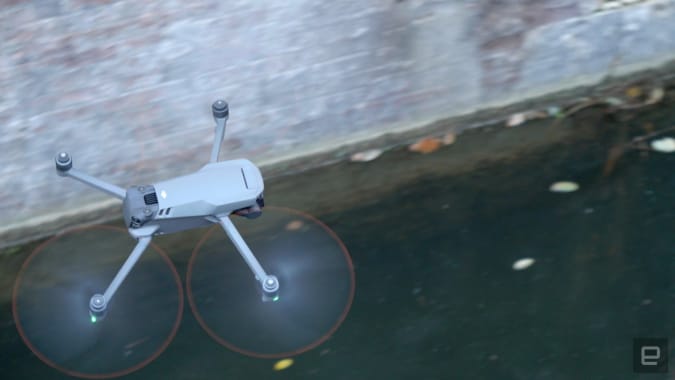
When you take off, it remembers your home position for the RTH (return to home function). It maneuvers flawlessly, helping pilots easily capture smooth footage under manual control. It’s not quieter than the Mavic 2 or 2 Pro, but it has a slightly lower tone that’s less likely to disturb people or wildlife.
Steve Dent/Engadget
It’s also faster, hitting speeds of up to 42 MPH in sport mode. Just remember that obstacle avoidance is disabled in that mode, so you’ll need to be careful to avoid (high-speed) crashes.
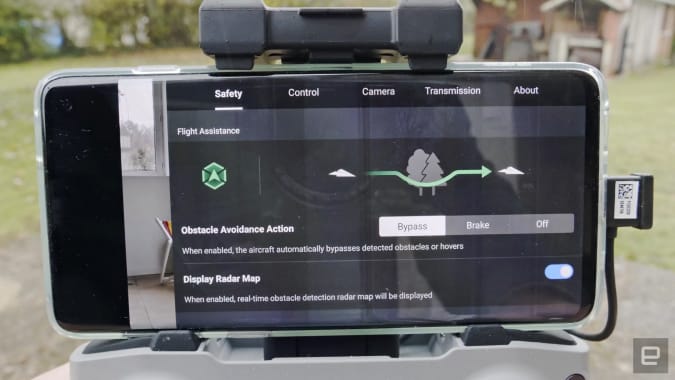
The Mavic 3 is covered with omni-directional sensors on the front, back, top and bottom. The app shows potential obstacles to help you avoid them, while the APAS 5 system lets you program the Mavic 3 to either stop when it encounters an obstacle or go around it.
We ran it through a gauntlet of hazards, including gnarly trees, power lines and more. It either stopped or dodged them, depending on the option we set. It did skim a leaf once while descending in RTH mode, though it didn’t phase the drone. However, it could indicate potential issues with the lower sensor array of the drone. The obstacle avoidance feature can be disabled in all modes, if you dare.
Steve Dent/Engadget
The RTH feature brings the drone back when the battery runs low, choosing the most efficient route possible. We found that it worked in all circumstances, even around tricky terrain and from miles away. The only drawback is that it doesn’t bring the drone back at a great speed, so many pilots may prefer to return manually in normal or sport mode.
One key feature that’s unfortunately not coming until January is ActiveTrack 5. As with DJI’s previous tracking systems, it’s designed to follow you around while you bike, windsurf and do other activities. The latest version is designed to track subjects no matter which way they’re moving and continue tracking even if they move out of frame. As this is an important feature, I may update this review later once I get a hold of it.
Other missing features include QuickShots to do fancy camera maneuvers like circles and boomerangs, along with MasterShots, designed to produce quick video clips for social media users. It also lacks the popular Panorama mode to create stitched photos, and QuickTransfer for rapid WiFi video and photo transfers.
This missing features aren't ideal, but delaying them at least allowed DJI to release the drone. Cameras from Sony, Canon and others often have key features added after the fact with firmware updates, so DJI isn't alone in doing this. Buyers will likely forgive the delays, but only if the updates arrive in January as promised.
Steve Dent/Engadget
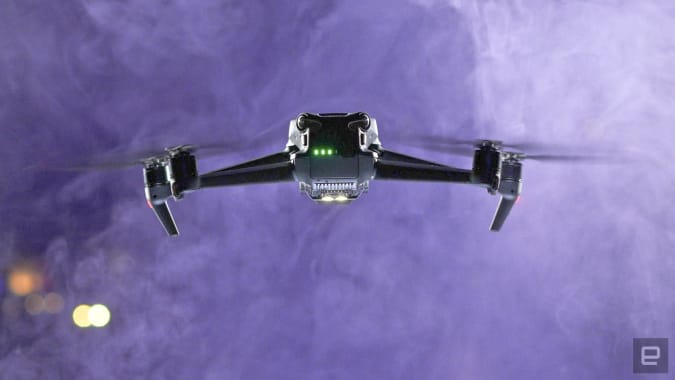
With its starting $2,200 price tag, the Mavic 3 is designed to take great videos and photos for professional and prosumer users. It strongly delivers in that regard, thanks to the pro-level sensor that delivers stunning image quality, along with stabilization that allows for insanely smooth shots. The ProRes video and 1TB internal SSD are also huge features for pro shooters.
It’s not perfect, though. Those same users may find the telephoto camera to be somewhat useless because it doesn’t deliver even close to the same level of quality as the main camera. They may also wonder why the standard model comes with a basic controller and limited Fly app, considering the relatively high price. The missing features like ActiveTrack 5 are a bummer, but once they arrive, everyone will quickly forget that they weren’t there at launch.
In terms of competition, DJI doesn’t have any peers when it comes to image quality (its tagline for the Mavic 3 is “Imaging Above Everything”). In other words, it’s laser-focused on cameras, as it recently showed with its crazy, amazing Ronin 4D. Other companies like Skydio, however, arguably offer better flying drones with superior obstacle avoidance.
Should these factors impact your buying decision? I’ll leave the final word to Samuel, the professional photographer and certified pilot who owns multiple DJI drones and assisted in this review.
“I am definitely interested in buying it, because it has a sensor that’s larger and performs at a high level so it’s a big step up in terms of image quality. The extra battery life also makes planning easier, and the drone is extremely stable, even in wind, so you feel like you have a ‘tripod in the sky.’ It has some flaws for sure, but for me, those are outweighed by the image quality benefits.”
All products recommended by Engadget are selected by our editorial team, independent of our parent company. Some of our stories include affiliate links. If you buy something through one of these links, we may earn an affiliate commission.
DJI Mavic 3 drone review: Cinematic power at a price - Engadget
Read More

No comments:
Post a Comment